If you keep your boat afloat in the water, whether seawater or fresh, you will need to apply a new coat on a special antifouling paint at least once a season to prevent excessive build-up of marine growth such as weed and barnacles. If you have never done this before it can be a bit daunting, particularly as boats out of the water look three times bigger! Actually is is relatively easy even for folk who don’t usually raise a paint-brush. Doing it yourself saves a lot of money, and also gives you the chance to have a close look at the condition of the hull. Assuming you are antifouling a boat that has previously been antifouled, here is how to go about it.
| Firstly, arrange to have your boat lifted out of the water and "blocked off", which means resting securely and level on blocks and props so you can work safely underneath. On a trailer is an alternative, but the underside is not so easy to get to. Get the boatyard to jet-wash the hull clean with fresh water, or failing that do it yourself and let it dry while you go shopping. | 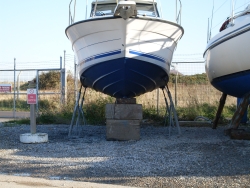 |
| A note on antifouling paint: this is a specialist subject and you need to do a bit of homework. This does not mean just choosing a colour the fish will like, you will need a type of paint that is suitable for the water you use the boat on (fresh or sea, temperate or tropical), the type of boat (fast, slow), type of hull material (wood, steel, fibreglass), and a paint that is compatible with the paint already on the hull. If it is not compatible all sorts of nasty things will happen and you will have to strip the whole lot off, re-prime and start again. The best thing to do is to seek advice from a manufacturer such as Teamac who supply free technical advice on the subject. For what it's worth I now use Teamac Antifouling D suitable for hull speeds of 20-25 knots. There is a detailed explanation of antifouling paints here | 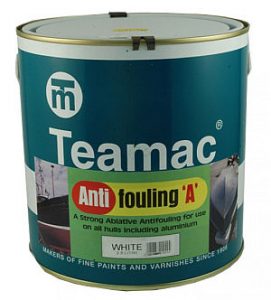 |
| Now off to B&Q for the following: a small paint roller and tray, several replacement rollers suitable for emulsion paint; a pair of tough rubber gloves, several pairs of disposable latex gloves or similar; goggles, dust mask, coarse wet-and-dry sanding block, one or two 2cm paint brushes and masking tape. Then raid the junk box for old clothes to wear, old clothes to rip up for rags and a few clean jam jars, at least one with a screw lid. Then off to the chandlers to buy antifouling paint for the hull, antifouling for the outdrive leg if you have one, and thinners. Don't forget to take a screwdriver, stirring stick, a dustpan brush, a bucket and a paint scraper. (Alternatively you can get the Antifouling Kit from Teamac) | 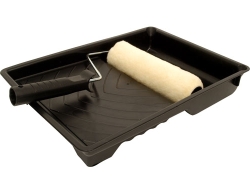 |
| Before you start messing about with antifouling whether old or new, make sure none of that nasty stuff gets on you or in you. As a minimum, wear overalls, a breathing mask, goggles and gloves. I use a heavy duty rubber glove when rubbing down and cleaning, then thin stretchy disposable gloves for a delicate touch while painting. It does get a bit sweaty in there while you are working but stick with it, you really wouldn't want to get antifouling paint in your eye or dust in your lungs. | 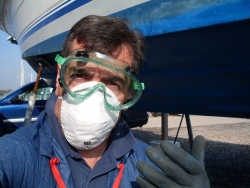 |
| Now for the hard work. You need to go over the whole hull under the waterline to remove flaking paint, check for damage, rub down any imperfections or barnacles, clean off muck and also look for signs of blistering caused by osmosis. If you see any damage, now is the time to fix it. Check your antifouling paint instructions, they may want you to key the surface with a quick sanding. Whatever you do, always work with a wet sanding block or paper, never sand antifouling paint dry. (If you see blistering, go and get expert advice, don't ignore it). | 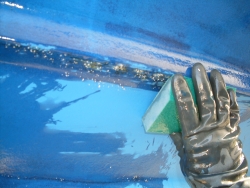 |
| If you find paint that flakes, peel off all you can and re-prime that area. If you find any chips in the gel coat, dig out any damage and re-fill with epoxy filler - you can buy packs designed for use below the water line. Sand down to the level of the hull around it. No need to be too picky, it is about to be covered in thick sticky paint. | 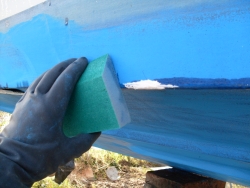 |
| Now wash down to remove any dust and bits. After many trials and water up my sleeves, I have found a dustpan-type brush and a big bucket of water is best. A power washer is probably better but I don't have one, although it will make the area very wet and you'll be crawling about there again soon. | 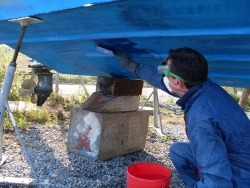 |
| While the hull is drying, apply masking tape to make a nice sharp line dividing the antifouling from the top-sides. You can buy different sorts of tape so check the instructions, some (the cheaper type) have to be pulled off soon after painting otherwise it sticks fast and is a pig to remove. | 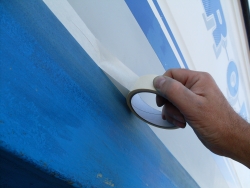 |
| When the hull is dry you can start painting. I find the best tool for this is a small roller and tray, with a 2cm brush for any fiddly bits. A small roller is less tiring and you can get a good even finish. Some paint manufacturers recommend two coats, if so apply the second coat within the timescales they say. Once applied, the boat has to go in the water within a specified time (up to three months depending on type and temperature) and this will be stated on the tin. If you have an outdrive leg, this needs exactly the same treatment but do not paint anodes, nipples or rams. You can paint alloy propellers but not stainless ones. You will need antifouling paint specially designed for propellers and outdrives. | 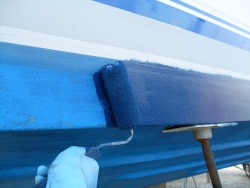 |
| And that is all there is to it. Job done and ready for the water. You will have noticed that you couldn't paint where the blocks and props touched the hull. This can be done when the boat is in slings and about the go into the water. If you leave a small quantity of paint in a screw-top jam jar and an old paint brush with the boat, the yard men will usually paint the patches for you if asked, it is common practice in boat yards when they launch after a lift-out for antifouling. |  |