Ideally, send them away to be serviced. OK, not all of us do that so here is the next best thing.
- Visually inspect all over for damage, and repair if possible. Visually check the condition of stitching on all the straps too.
- Unwrap the bladder (inner yellow bit) and check for damage.
- Check the firing mechanism – it will have a replace-by date and a green/red indicator. Replace if red or out of date.
- Check the gas canister if you can see it. Replace if there is any corrosion on the surface.
- If the canister is not corroded, weigh it – check it’s above the MIN. GR. WT stamped on the side and replace if it’s below that weight.
- Blow the lifejacket up using the mouthpiece. Preferably, use a pump to prevent getting damp air from your breath inside the bladder. Blow it up until firm
- Leave 24 hours, and check if it is still firm. If it has lost noticeable firmness, send it away for repair or replace.
- Repack according to the instructions.
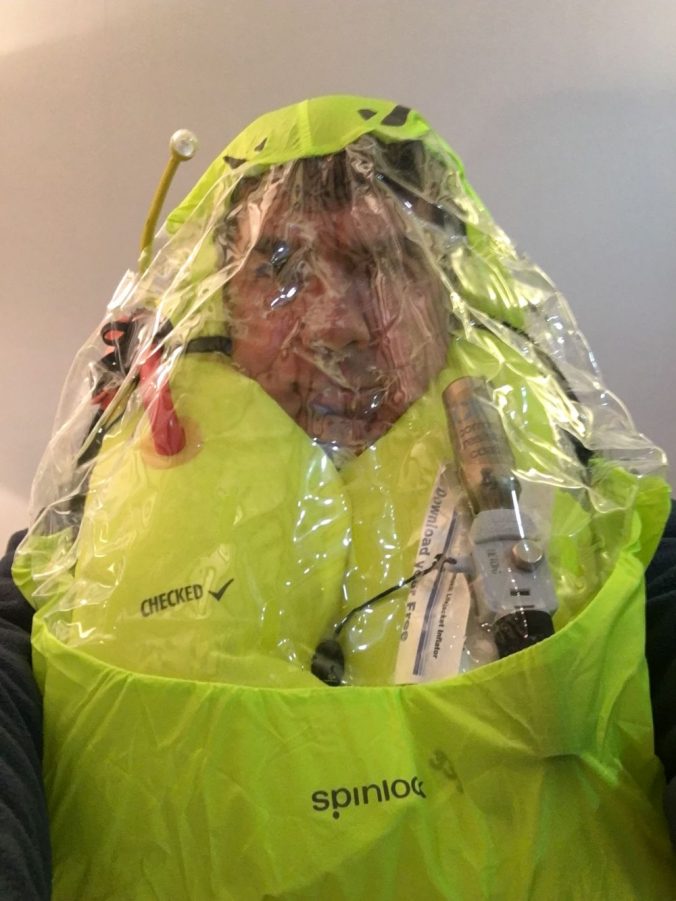
Here is an extra tip. Try it on in the inflated state, and make sure you know how to do things like pull over the spray hood, pull out the EPIRB to activate and switch on the light. You might (or might not!) know where these things are in the packed state. It will all seem very different when it is inflated and you have time to find things when you are in a warm dry room. Better to get familiar now than in the cold water. I am glad I tried out the spray hood on my Spinlock – I don’t think I would have realised how it works without benefit of a mirror and a bit of practice!
My thanks to Andrew (Clinker) of WSF for improving this list of checks!
Leave a Reply
You must be logged in to post a comment.